WordPress is translated into over 76 languages, with non-English downloads surpassing those in English in 2019.
WordPress is now truly a multilingual product.
With so many languages now available, offering a native language WordPress website is now easier than ever.
If you wanted to offer your website in another language, one method would be to copy the existing website and change the default language.
How do you change the default language of your WordPress website?
That’s very easy to do.
From the administration dashboard, login as an admin user and navigate to Settings > General.
Midway down the page, you will see a dropdown selector for Site Language.
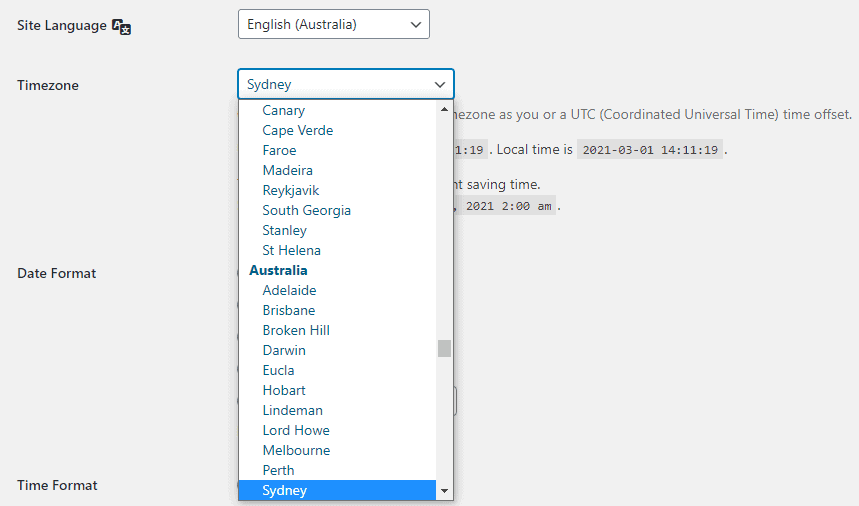
Click on the dropdown and scroll through to select the default language you want for your WordPress website, and click on Save Changed.
WordPress will download a language pack in the background and automatically apply it.
This is an instant change, site-wide.
All WordPress system messages and user interface elements are translated into the new default language.
WordPress User Profile Default Language
WordPress also allows for user-specific languages to be loaded in.
For example, if you have changed your WordPress site’s default language to Japanese, you can set English as your language preference in your User Profile settings.
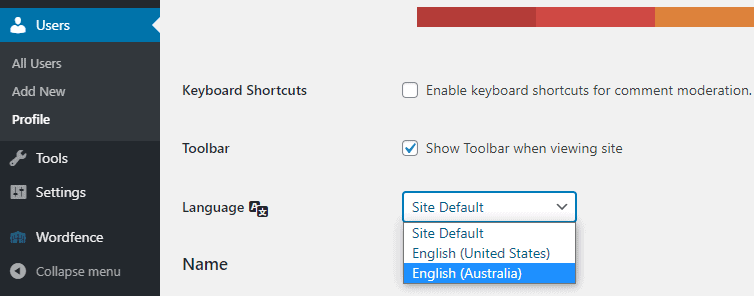
WordPress will then translate the website into the chosen language you have specified in your user profile.
This is super handy if you are administering a website with the default language you are unfamiliar with.
Please note, this translates system language only, not post and page content.
Post content will remain in the language it was authored in.
Manually Installing WordPress Language Packs
What happens if your language does not appear in the dropdown list in Settings > General: Site Language?
It could be that there are no translations for your chosen language, or perhaps it is not yet 100% completed.
In this case, you need to download the language pack you are looking for and manually install it on your WordPress website.
1. Go to the WordPress translation team page – the polyglots
2. Scroll down the list until you find your desired language
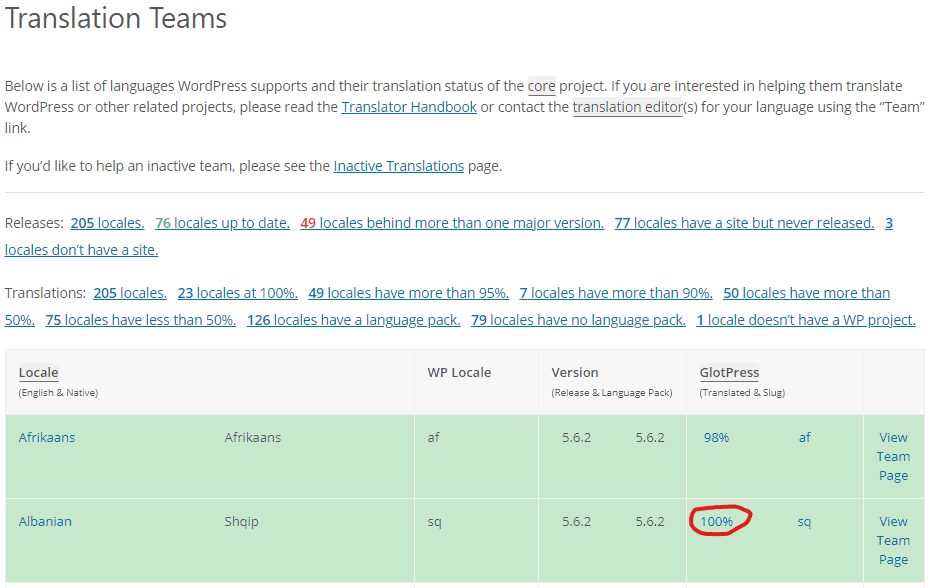
3. Click on 100% along the row of your preferred language. You can download <100% language packs but they are not yet completed.
4. From the “Set / Sub Project” column, click on the current WordPress version – this is usually at the top of the table. In the screenshot below you would click on the “5.7.x – Development” link.
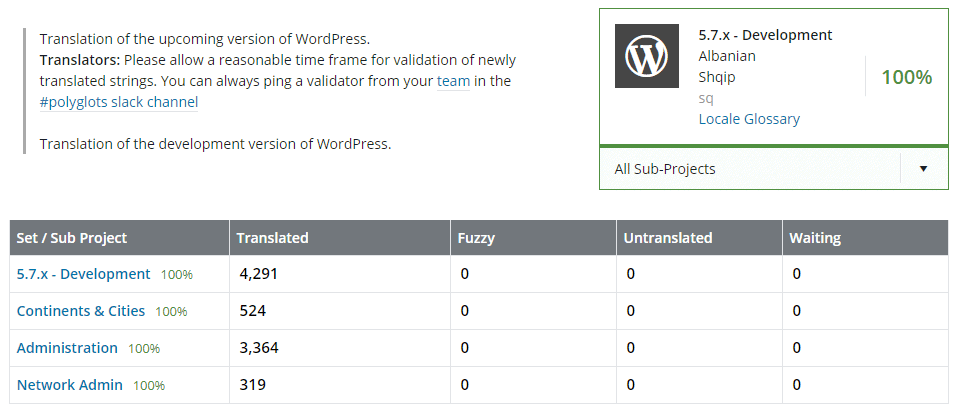
5. On the next page, scroll down to the bottom where the “Export” link is
6. Make sure the filter dropdown is set to “all current” and the format dropdown is set to “Machine Object Message Catalog (.mo)”
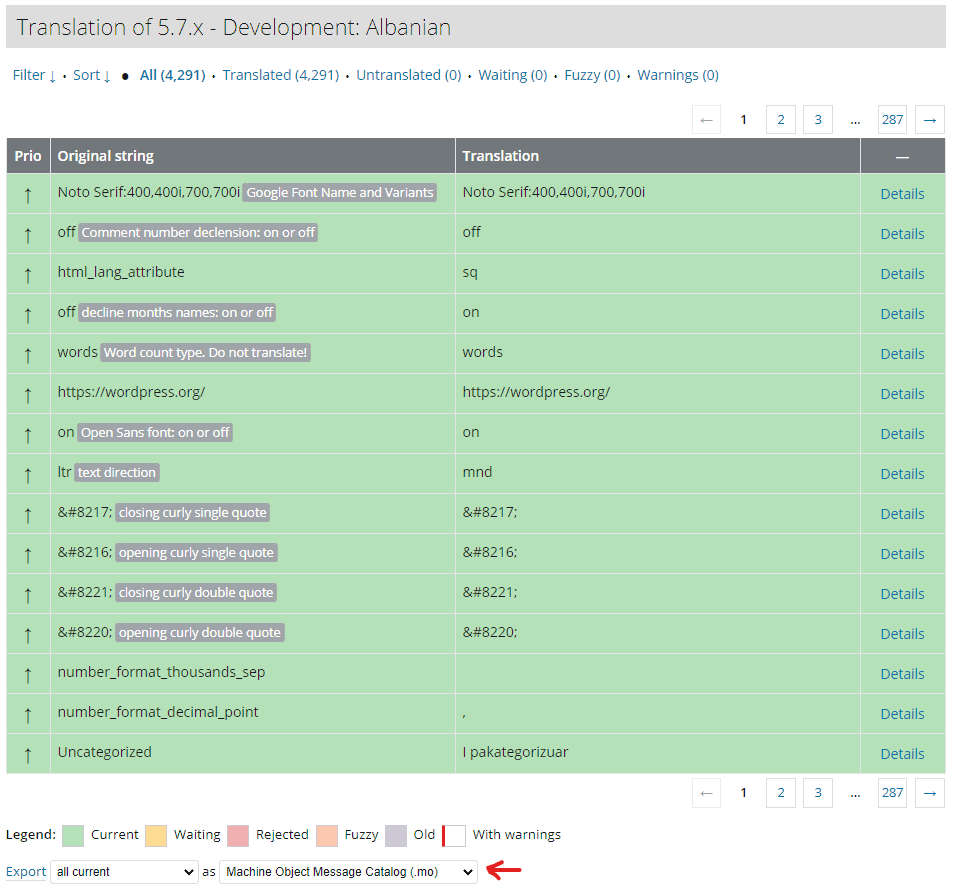
7. Click on Export to download the file – you may have to rename the filename to somthing more recognisable – in this case I would rename the downloaded file to “Albanian.mo”.
The language pack has been downloaded successfully to your local computer but you still have to install it into your WordPress site.
Installing A WordPress Language Pack Manually
The best method of copying the file to your live WordPress website is to use your web hosting cPanel or Plesk login.
1. Login to cPanel or Pleak and locate the File Manager icon and click on it to bring up the File Manager window
2. Navigate to your “/wp-content/languages” folder. If the “languages” folder doesn’t exist, create it inside the “/wp-content” folder, making sure the name is all lowercase. There’s a “+ Folder” button at the top of File Manager.
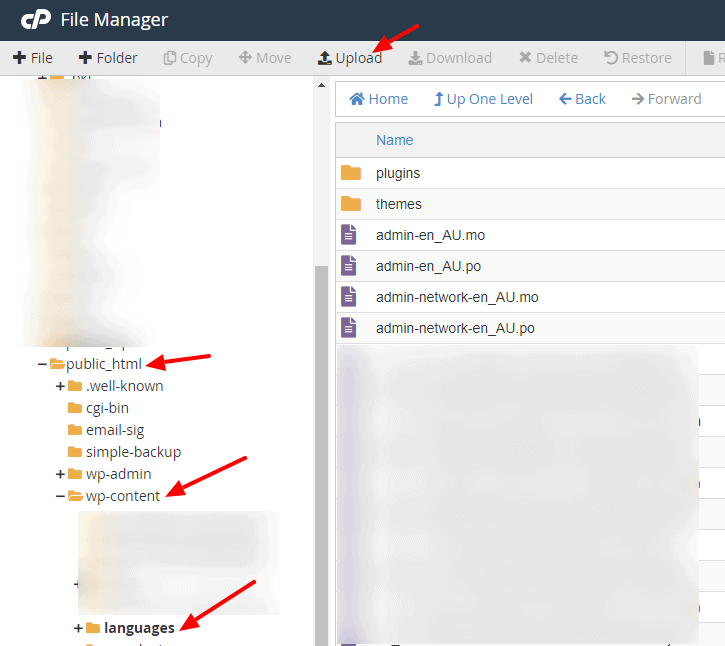
2. Once inside the “/wp-content/languages” folder, click on the “Upload” button at the top of File Manager, locate your downloaded language file, in my example, the renamed “Albanian.mo”.
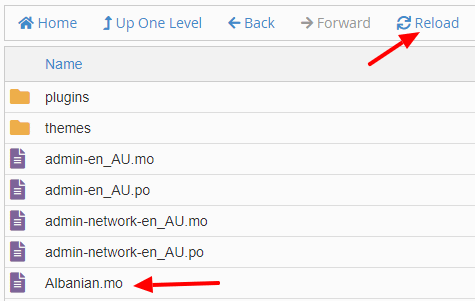
4. Click on the “Reload” button at the top of File Manager to refresh the page and your new language file should appear in the list.
5. If you navigate back to your WordPress admin dashboard Settings > General and select the “Site Language” dropdown, it will now show your new language available for selection/
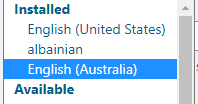
6. Save the settings to set the WordPress default language for your website.
Multilingual Plugins
There are a few plugins that can also help you translate your WordPress site post and page content into another language.
Weglot
Weglot is a new contender to the WordPress multilingual plugin scene.
It has been built ground-up for speed and efficiency.
Polylang
Polylang is a free language translation plugin with pro paid options.
WPML
WPML was the first multilingual plugin for WordPress and has an extensive number of add-ons to make it compatible with other popular plugins.
Conclusion
WordPress makes it easy to set the base language for your website as well as offering different languages for your logged-in users.

