In this lunchtime #WPQuickies, I’ll take you through how to set up your WordPress website with the Cloudflare CDN for speed and security boosts.
What Is Cloudflare CDN?
Cloudflare is the most popular free Content Delivery Network (CDN).
It has a vast amount of distributed servers in different countries that store a static copy of your popular website pages, delivering them to local audiences for a faster response time.
On top of a CDN service, Cloudflare is also a cloud-based website firewall and a distributed proxy server. It monitors all incoming traffic to your website and blocks suspicious traffic even before it reaches your server.
At present, a CDN is your only defence against a Distributed Denial of Service (DDoS) attack.
Benefits Of Running WordPress Through Cloudflare
The most obvious benefit is speed.
The CDN will deliver cached content to your website visitors quicker than a normal request to the webserver.
This is going to increase your visitor engagement and boost your position in the Search Engine Page Results.
Other benefits include increased security, access to a free SSL certificate and a wide range of apps you can run on your website through Cloudflare.
Using a CDN will also reduce the physical resources needed by the web server allowing it to serve more visitors.
How to Install Cloudflare on Your WordPress Site
You can install Cloudflare on WordPress using Cloudflare’s free account.
I’m assuming you already have registered for a Cloudflare free account. If not, go and do this now then come back to this tutorial.
Adding Your WordPress Site To Cloudflare
After logging into your free Cloudflare account you will be told that you don’t have any websites.
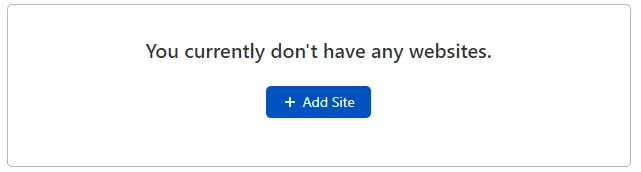
Go ahead and click on the add site button and enter your website URL.
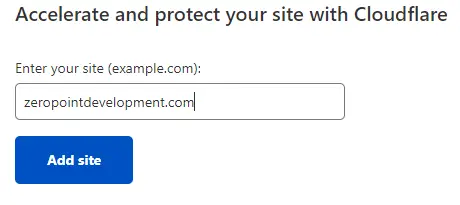
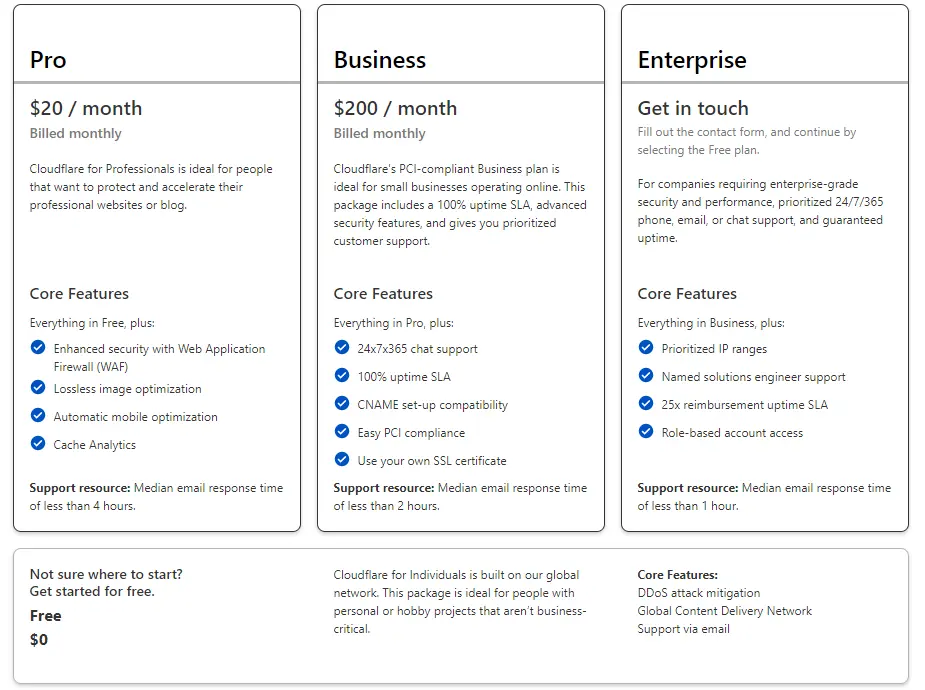
Cloudflare will verify the site exists and show you a list of pricing plans.
You can go ahead and choose the free plan at the bottom of the screen.
Once set up, you can read through the other plans and decide for yourself whether you want to pay for those benefits or not.
Once you have selected the free plan, Cloudflare will attempt to scan the DNS records for your website and ask you to verify the results.
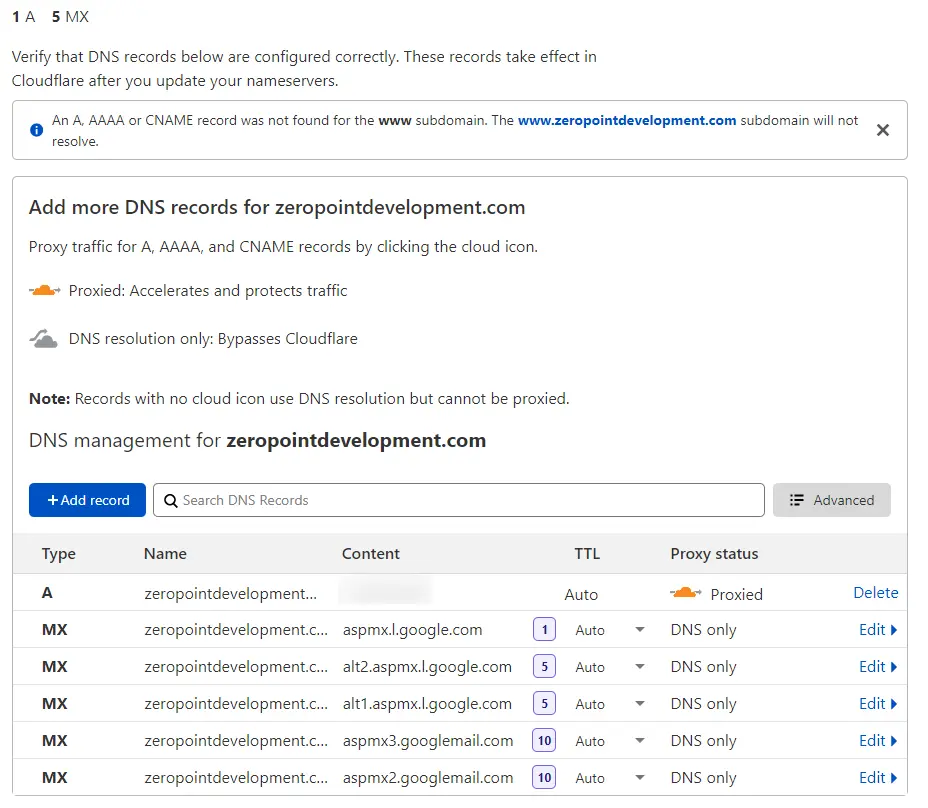
You can see here that it has identified my A record which points to the IP address of my web server and the MX mail records pointing to my Google Workspace account.
By default, Cloudflare will proxy all A records.
This means that Cloudflare will hide your actual web server IP, masking it behind one of their proxy machines.
This helps protect your web server from direct attacks.
You can choose to remove the proxies and bypass Cloudflare for any A record but you’re not going to get all the security goodies that come along with it.
Why would you want to do this?
Well, you may have other web services set up, other than WordPress, that need the IP address directly exposed to work with third-party APIs and services.
Changing Name Servers
Once you have verified that your DNS records are correct, you need to change your name servers to point to the ones specified by Cloudflare in this step.
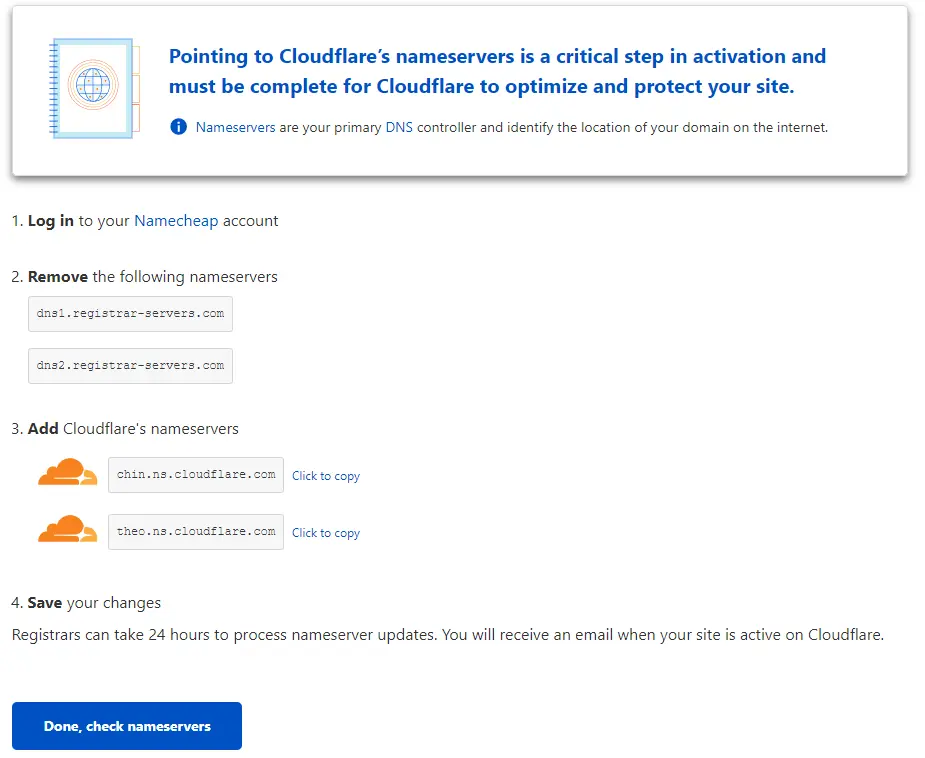
Name servers are lookups that translate the easy-to-read domain name to the machine IP addresses.
To change your name servers, you need to log in to your domain registrar.
This is the company that you purchase your domain name from – or the one you transferred it to, to get a better renewal price.
Domain registrars can be a separate company from your web hosting provider.
When that’s done, come back to Cloudflare and click on the “Done, check nameservers” button.
This process can take a day to complete and depends on the update time set in the DNS records.
This time is called Time To Live (TTL) and it tells the nameserver how long to cache your DNS records for.

A great tip is to have a look at the TTL values for your DNS records before you update the nameservers to the Cloudflare ones and lower their TTL to the lowest time possible.
TTL is measured in seconds.
In the example above, 3600 seconds is one hour.
After the update goes through and Cloudflare has verified the name servers change, come back into your DNS record and restore the TTL values to their previous value.
Cloudflare Dashboard With Analytics
Once your name servers change has been detected you will be presented with the Cloudflare dashboard.
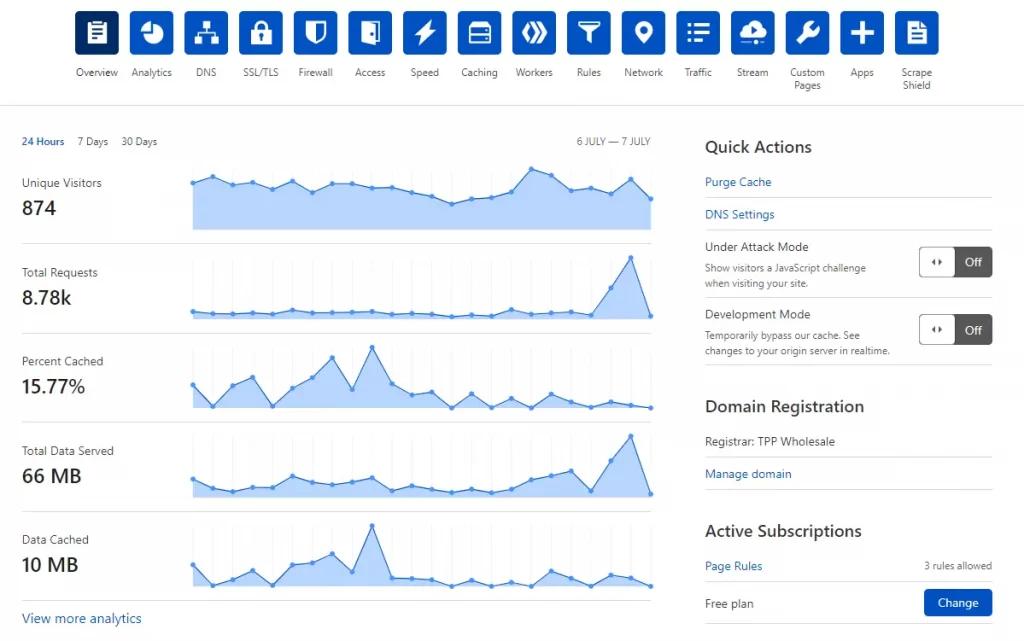
Here you have some analytics, along with options to configure your Cloudflare website options.
Configure WordPress Specific Page Rules
By setting up page rules, you can customize how Cloudflare works on specific pages on your site. It is especially useful in securing critical pages like login page, wp-admin area, etc.
Cloudflare free account allows you to set up three page rules. If you want to add more page rules, then you need to pay $5 per month for five additional rules.
First, you need to click on the Page Rules option at the top and then click on the Create Page Rule button.
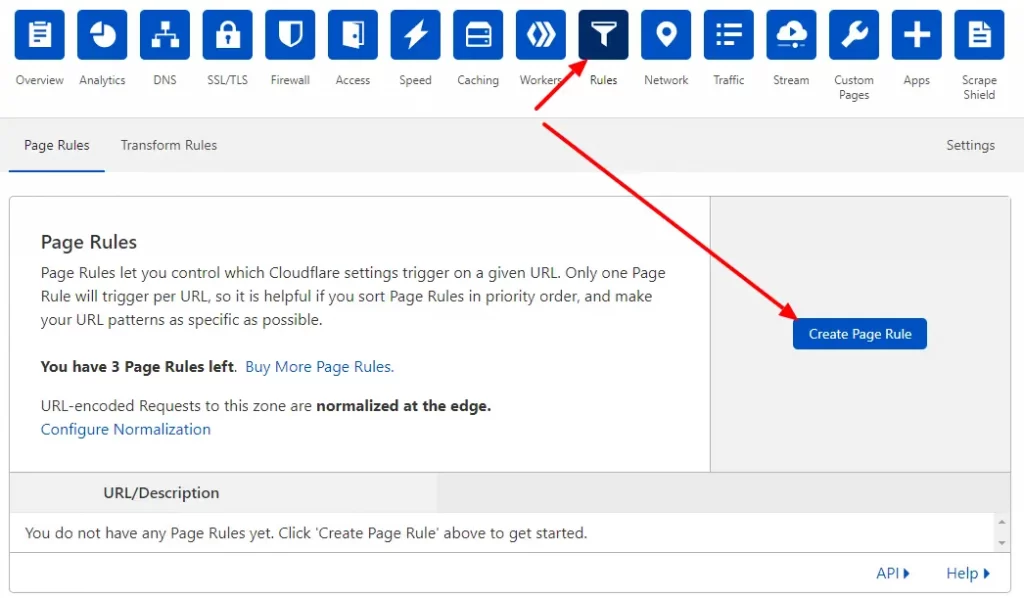
Go ahead and click on the Rules icon, then the “Create Page Rule” button.
Bypass The WordPress Dashboard Area
We’re going to tell Cloudflare not to cache anything in the WordPress admin dashboard area.
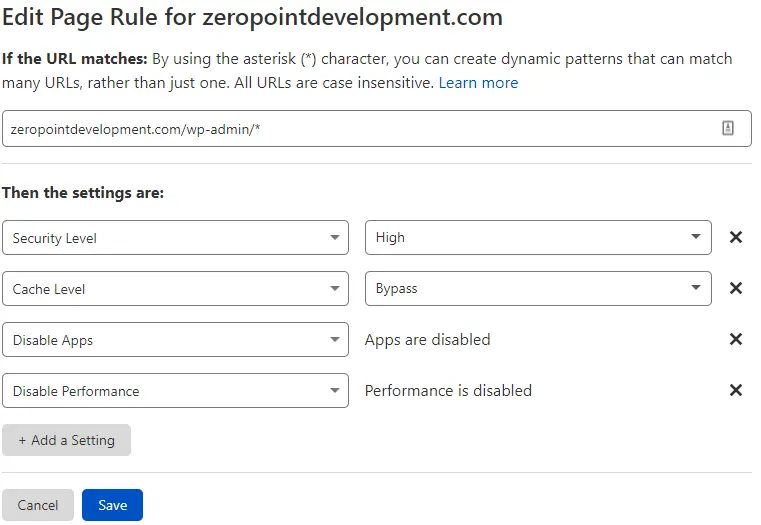
The settings are:
- Security Level: High
This challenges suspicious activity in the admin dashboard area - Cache Level: Bypass
- Bypass all caching
- Disable Apps
Prevents any Cloudflare apps from running in the WordPress dashboard area - Disable Performance
Prevents Cloudflare from collecting stats for this area.
Set the page rule up with the setting in the image above, replacing your website URL.
You don’t need to include the HTTPS protocol.
Set High Security For WordPress Login
Here we tell Cloudflare to monitor the WordPress login script wp-login.php for suspicious activity by setting the security level too high.
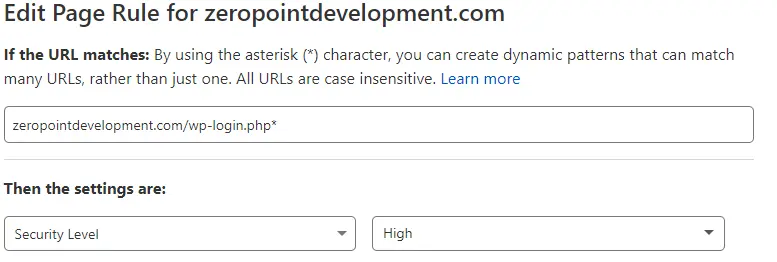
Replace the page rule URL with your own website domain name URL.
This uses up to two of your free page rules.
WooCommerce Cloudflare Page Rules
If you run a WooCommerce site, you really should set up rules to bypass the dynamic pages for My Account, Cart, My Account and Checkout.
The format for the page rules would be:
- domain.com/my-account*
- domain.com/cart*
- domain.com/checkout*
With these page rule settings:
- Disable Apps
- Disable Performance
- Cache Level: Bypass
The same will be true if you are using any e-commerce plugin, for example, Easy Digital Downloads or MemberPress.
Other Useful WordPress Cloudflare Page Rules
Here are some other Cloudflare page rules that you can use with your WordPress website.
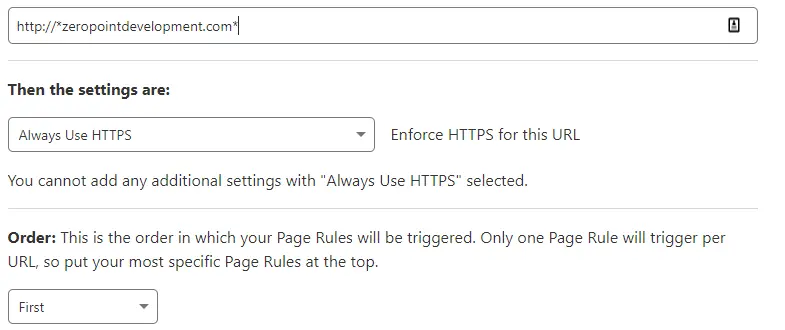
Use HTTPS
If your web host doesn’t offer a free SSL certificate option, you can use Cloudflare to supply a free one for your website.
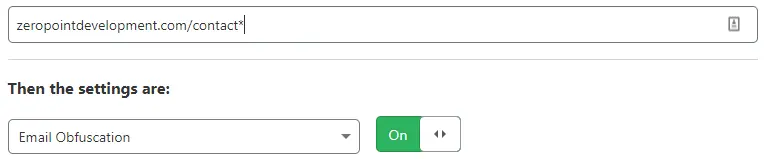
Obfuscating Email Addresses
Stop bots grabbing your email address for spam purposes.
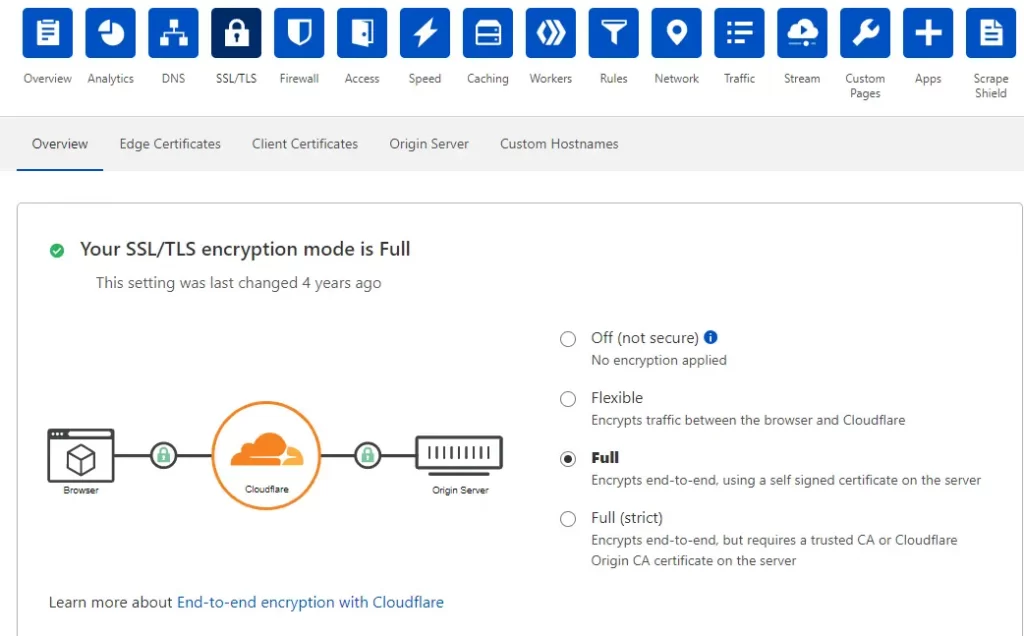
Set SSL To Full Mode
If you are using the Cloudflare SSL certificate, remember to run in “Full” mode.
Cloudflare WordPress Plugin
Cloudflare offers a dedicated WordPress plugin that can set up these page rules and other optimisations for you.
You can find the plugin at https://wordpress.org/plugins/cloudflare/
I personally don’t use this plugin and prefer to add rules and change settings manually.
How to Clear Cloudflare Cache
A common issue you may get with Cloudflare is the caching of old pages, especially after a theme or plugin update.
It’s easy to clear your WordPress website’s Cloudflare cache.
Log in to your Cloudflare account and click on the “Caching” setting, then “Configuration”.
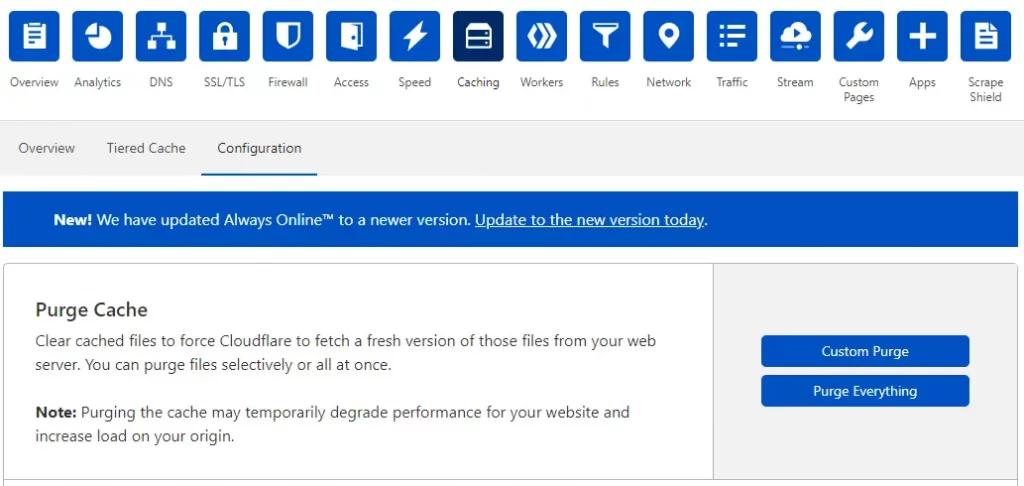
You can perform a custom purge for specific URLs or zap the whole cache.
Additional Features: Apps
There are heaps of additional apps that you can run across your website, even using the free Cloudflare plan.
Some of these apps can save you having to install a WordPress plugin and that’s going to make your website go faster.
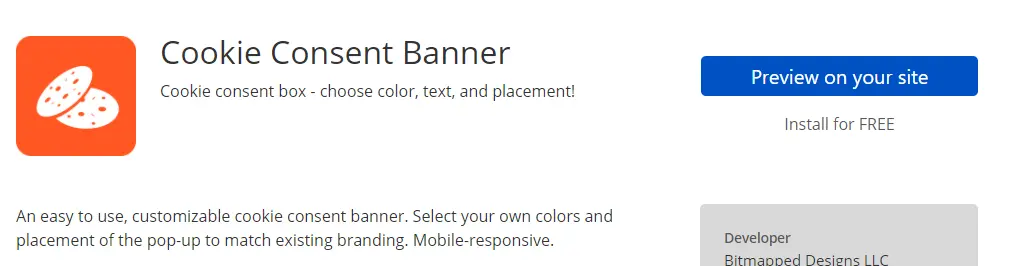
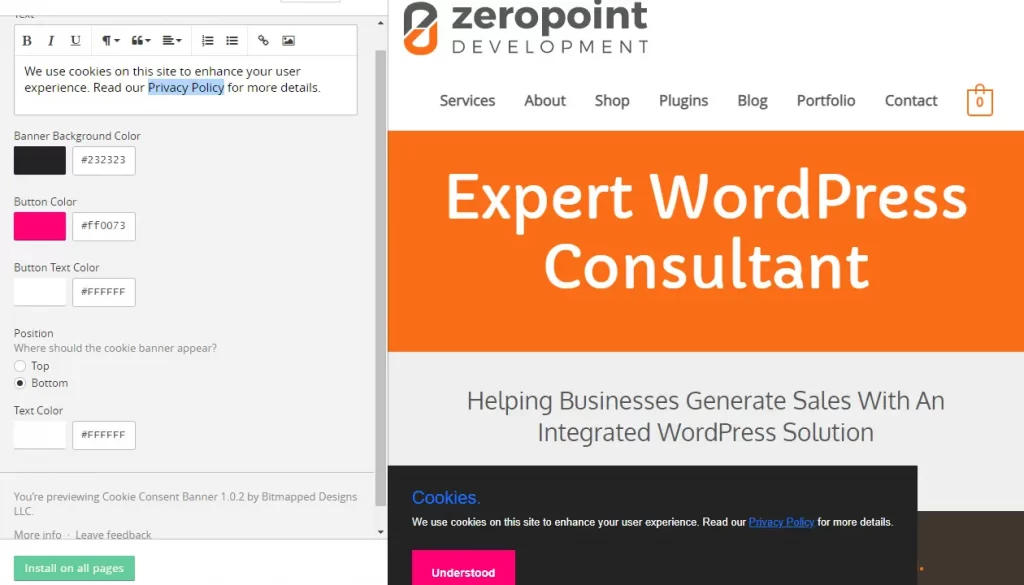
Cookie Consent Banner
Here’s a screenshot of the preview mode.
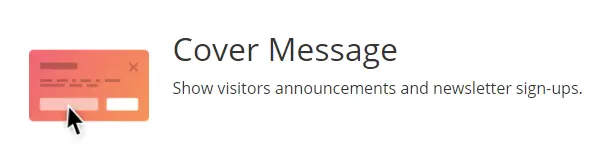
Cover Message
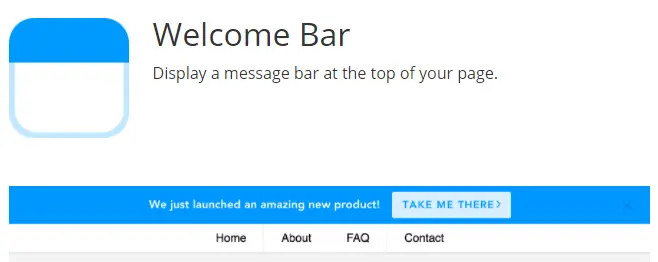
Welcome Bar
I use this app on client sites if there is an urgent message that needs to go out or for seasonal or other promotions.
Social Icons
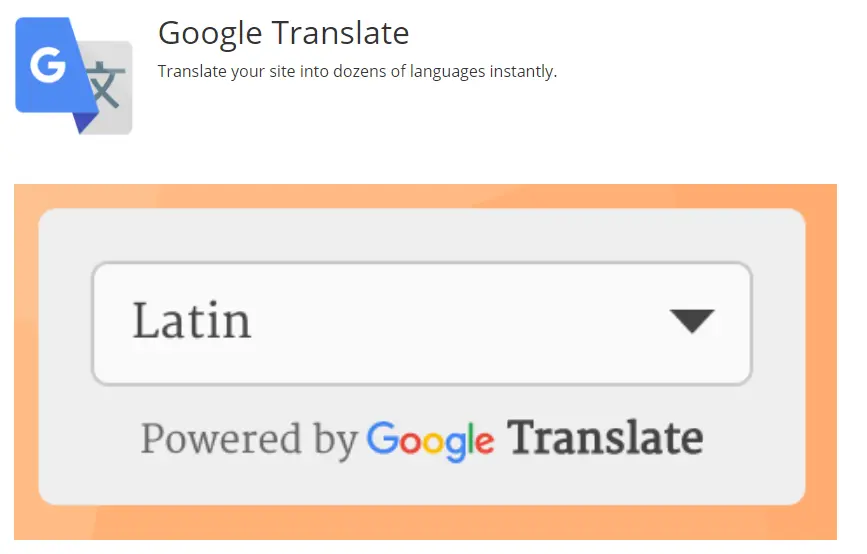
Google Translate
Summary
That’s my introduction to setting up Cloudflare with a bonus look at some useful apps that you can replace WordPress plugins with.
Even using the free version of Cloudflare is going to five your website some speed and security enhancements.
#WPQuickies
Join me every Thursday at 1 pm Sydney time for some more WPQuickies – WordPress tips and tricks in thirty minutes or less.
Broadcasting live on YouTube and Facebook.
Suggest a #WPQuickies Topic
If you have a WordPress topic you’d like to see explained in 30 mins or under, fill out the form below.
https://forms.gle/mMWCNd3L2cyDFBA57
Watch Previous WPQuickies
Protecting WordPress PDF Files

