Follow these 14 critical steps for launching your website perfectly, fully optimised for high search engine rankings that will kill your online competitors.
You’ve spent a heap of time and money on getting your WordPress site designed and it’s looking good.
Don’t make the mistake of launching the site before it’s fully optimized using these tried and tested fourteen critical steps.
Step 1 – Optimize All Your Images
An image says a thousand words and that’s very true.
You can convey a large amount of information by including an image.
Images are an important part of storytelling.
High-quality articles will use plenty of images to give more depth to the story.
However, images need to be properly optimised before they are uploaded to your articles.
We should make them as small as possible so that they can be consumed on mobile devices and don’t hold back the loading of the entire web page.
Image file size is usually dependent on the actual size of the image (width and height) but other factors can contribute such as image quality (for file formats such as JPG) and embedded information (EXIF data) such as aperture, shutter speed, ISO etc.
Unless you really need to display that data in your articles, it can easily be stripped out.
The height and width images should be reduced to the maximum size it will be viewed on the largest web page.
There are even new CSS statements called srcset which allow you to show differently sized of images to different sized display screens such as tablets and mobile phones.
Some recommended tools to use are:
- Kraken.io – web-based image optimiser. Pricing plans increase for larger amounts of data.
- TinyPNG – free web-based image optimiser for JPG and PNG files.
- PNGGauntlet – free Windows desktop app for optimising images.
Step 2 – Minify CSS and JS Files
Any theme can contain hundreds of CSS and JavaScript files that the web browser needs to download to render your website pages correctly.
When developing a site, most of these files are updated in a readable format so that the theme can be maintained and updated in future releases.
However, readable files usually contain a lot of whitespaces and comments.
These all take up space which means a larger file to download.
Tools exist to remove whitespace and comments from these types of files – they work just the same without!
This process of shrinking files is called minification.
Here’s an example of some CSS before minification:
[pastacode lang=”css” manual=”%2F%2F****%20Colour%20CSS%20***%2F%2F%0A.a%7B%0A%20%20color%3A%20blue%3B%0A%7D%0A%0A.a%3Ahover%7B%0A%20%20color%3A%20orange%3B%0A%7D” message=”” highlight=”” provider=”manual”/]
And here is the same code after minification:
[pastacode lang=”css” manual=”.a%7Bcolor%3Ablue%3B%7D.a%3Ahover%7Bcolor%3Aorange%3B%7D” message=”” highlight=”” provider=”manual”/]
This may be a small example but imagine all that space saved over thousands of lines of code in hundreds of files and it all adds up to a lot of space, hence download time, saved.
There are a couple of ways you can implement minification.
If you are a non-developer, I recommend using the Auptomize plugin.
It has settings that will minify all your existing CSS and JavaScript files.
If you are a developer you may want to look at using a task runner called Gulp to minify your CSS and JS files in real-time as you update them.
Step 3 – Load all Your JS Files at the End of the Page
Everything is about speed when you are launching a new website.
Google takes web page load times seriously and it’s part of the ranking factors.
Website visitors are also demanding information instantly so if you keep them waiting at a blank screen for a few seconds while all your images and scripts download, they are likely to go elsewhere.
We can help speed up our page rendering time (the time it takes to start displaying content in the web browser), by getting the web server to load script files after the main HTML content has been downloaded and displayed by moving scripts to the web page footer.
Web pages are rendered top to bottom, one file at a time (synchronously – note HTTP2 compliant web servers download files asynchronously so this is not such an issue).
By forcing scripts to load in the footer, the majority of your HTML and therefore page content has already been downloaded and is being displayed on the screen.
If you are a non-developer you can try using the Scripts to Footer plugin. Please note that your theme needs to have been developed using WordPress coding standards and best practices.
If you are a developer, you can use the function wp_enqueue_script() along with the last parameter bool $in_footer = true to force the script to load in the footer area of the web page.
Step 4 – Secure Your Site With an SSL Certificate
In 2017 I wrote about changes in the Chrome address bar that highlights non-secure websites – i.e. those with no SSL certificate.
Due to the huge uptake of secure sites, thanks to Let’s Encrypt, as of 2018 the Chrome browser removed the green “Secure” from the address bar.
They also introduced the “Not Secure” for ALL HTTP websites.
That’s right! If you don’t have an SSL certificate, Chrome broadcasts to visitors that your site is not secure!
Think about that for a minute.
Previously, visitors were happy browsing your website, then suddenly, over-night, your site is no longer secure.
How many visitors are leaving your site because Chrome, and most other browsers, are telling them your site is not secure?
Once a necessity reserved just for eCommerce checkout and payment pages, having a secure site is a must for any website in today’s online world.
It fast becoming a very important ranking factor for Google in their search ranking algorithms reflected in the work they are bringing to the address bar in Chrome.
Google’s Chrome browser plan is that everyone should expect a site to be secure when browsing the web, so eventually, they plan to remove the padlock in the address bar altogether.
Here is how Chrome treats secure HTTP pages since September 2018 on Chrome 69.
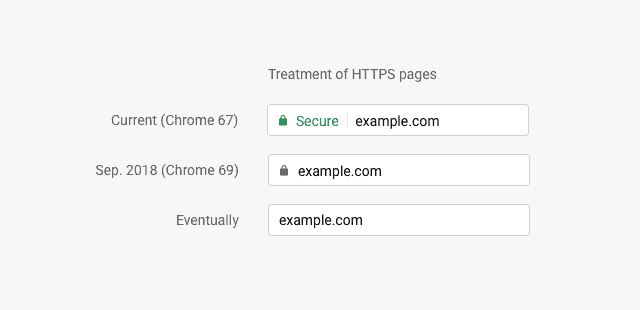
Previously, HTTP usage was too high to mark all HTTP pages with a strong red warning, but in October 2018 (Chrome 70), we’ll start showing the red “not secure” warning when users enter data on HTTP pages.
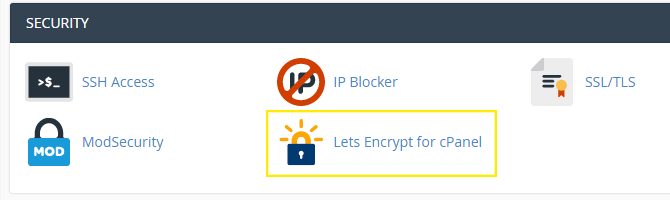
Getting an SSL certificate is becoming an easy business thanks to Let’s Encrypt who offer free SSL certificates for any domain name.
![]()
Starting in 2016 Let’s Encrypt have already issued close to 160 million free SSL certificates.
Most hosting providers have now added a Let’s Encrypt icon to their control panels allowing you to secure your site in a matter of minutes.
SSL certificates should auto-renew after 90 days, so you’re pretty much set up for life – for free!
As of January 2018 Let’s Encrypt started offering wildcard SSL certificates so all your subdomains can be secured too.
They don’t offer Organization Validation (OV) or Extended Validation (EV) certificates because of the issues linked to the automation of company and organisation verification.
You will have to talk to your hosting company if you are looking to purchase an OV or EV certificate for your website, however, in my opinion, EV certificates are dead and no longer worth purchasing.
Step 5 – Check for Broken Links
The last thing you want to happen after you launch your website is for Google to start finding broken links on your site.
Not only does it stop the search engines from properly indexing your site, but it also flags that you’re not taking adequate measures to maintain your site and that will lower your overall search engine ranking score.
Thankfully checking your site for broken links is a pretty easy task and there are several ways to do this.
However, before we get to the good links, you should not install the Broken Link Checker WordPress plugin.
This plugin hasn’t been maintained for over two years and it eats up a huge amount of server memory and CPU slowing down your site. It is banned on most WP managed hosting.
I recommend the following for checking for broken links:
- Brokenlinkcheck.com – web service. Limited link depth but will cover most websites.
- Crawly – free and paid services.
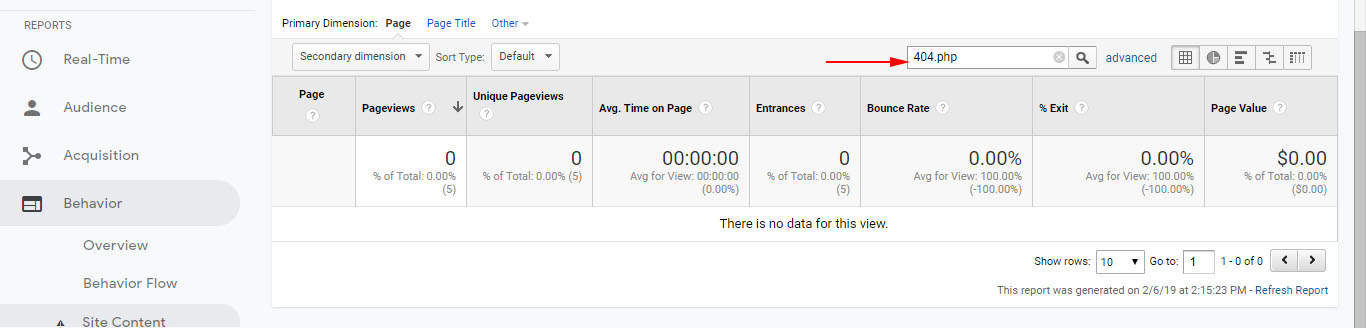
- Google Analytics – Behaviour > Site Content > All Pages and search for your 404.php page.
Step 6 – Redirect URLs
This step doesn’t apply if you are launching a brand new website.
If you are moving sites, domains, pages and post around you really need to be implementing redirection so that you don’t lose the SEO traffic those old URLs already have.
Redirecting URLs is pretty simple.
If you use the Apache web server, you can create rewrite URLs in the .htaccess file.
Nginx users can achieve the same thing using rewrite statements in the location server block.
If those options above scare you and you don’t want to muck around with server configurations then you easily install a redirection plugin for WordPress.
There are hundreds, however, I have used and recommend the following:
- Yoast SEO Premium – The Premium upgrade is good for redirections and lots more SEO stuff
- Redirection plugin
Step 7 – Add Favicon and Apple Icons
Site icons, called Favicons play an important part in branding and are used when you bookmark a page on a site, especially so on mobile and tablet devices.
If your site doesn’t have a favicon there are plenty of online generators that you can upload and crop an image to create one:
- favicon.cc
- favicongenerator
- iconifer – this also generates Apple Icons
Step 8 – Add and Configure Yoast SEO
I mentioned Yoast SEO Premium in the redirection section, however, it’s main use is to tailor individual posts for optimal search engine page rankings.
In my books, this is an essential plugin for all websites.
Yoast SEO generates a snippet of how your post will look in the Google search rankings which is a fantastic visual reference.

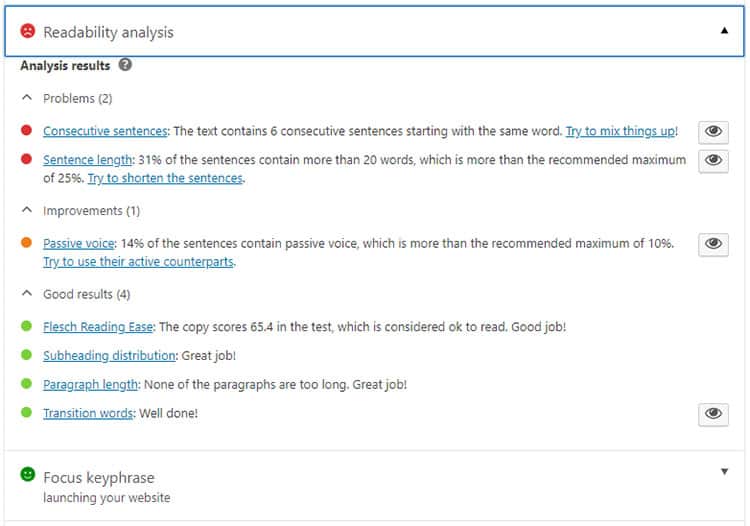
Yoast SEO primarily uses traffic signal colours to show you how well your post’s SEO is.
Green is good, orange is could do better and red is bad.
It also allows you to enter the keyword focus for the post and generates advice on how well your content is written for that keyword, along with a more general SEO audit on the copy.
There is another plugin with similar features called All in One SEO Pack.
The two plugins pretty much dominate the SEO WordPress plugin sphere and are very close in functionality.
For me, Yoast SEO is slightly in front particularly for the content Readability Analysis section which the other plugin doesn’t have.
As well as post content, Yoast SEO also allows you to set general SEO items such as titles, metadata and sitemaps.
Read my comprehensive article on setting up the Yoast SEO plugin.
Step 9 – Add Wordfence Firewall
Security is key to maintaining your website authority, brand and customer confidence and loyalty.
I remember not too long ago, an Automattician (somebody who works for Automattic) told me that it shouldn’t really be necessary to install a firewall plugin on a WordPress site.
In an ideal world, maybe, but we live very far from the ideal and there are a lot of threats out there.
Especially threats explicitly targeting WordPress installations.
The best thing you can do in my opinion is to install a firewall plugin such as Wordfence.
I find the free plugin works very well.
It will scan your files once per day and notify you of any issues.
The firewall plugin lives up to its name and blocks IPs trying to use a brute force attack against your site.
Step 10 – Secure Your Website
Installing a firewall plugin is a great step but you really should go a lot further in securing your site against potential vulnerabilities and attacks.
I give a yearly WordPress Security Best Practices talk at our WordPress Sydney meetup events covering the main ways to secure your site.
I suggest you read that post or watch the video to get the best security tips for hardening your WordPress website.
Step 11 – Use Caching
You really want your website to load as fast as possible.
Using a caching plugin can help to do just that.
I always install a caching plugin on all my sites prior to launching.
The one I normally use is W3 Total Cache.
It works very well with Nginx web servers – I haven’t used Apache for a good number of years.
If you are setting up caching and you have dynamic pages on your site such as a checkout or a member dashboard, remember to add them to the exclusions list in the plugin settings.
Want to double up on the speed?
Consider running your site through the Cloudflare CDN.
A Content Delivery Network is a kind of global caching system.
They keep fragments of your visited website on servers dotted around the planet.
Visitors will be served the cached copy from the server closes to their location.
Cloudflare is usually also available as an icon in cPanel.
Step 12 – Set up Google Analytics Using MonsterInsights
You’d be bonkers mad if you didn’t sign up a site to use Google Analytics before launch.
Google analytics is free and provides heaps of data on website visitors and the content they are searching for and consuming.
One of the best plugins to use with Google Analytics is MonsterInsights.
MonsterInsights brings the Google Analytics data right into your WordPress dashboards and it also adds the JavaScript code needed by Google Analytics to run properly.
That can be a stumbling block for non-technical people.
As well as useful general visitor statistics, you can set up MonsterInsights to track events such as form submissions, downloads, button clicks etc.
The free plugin does heaps of stuff and the premium version gives you lots of extra features such as reporting.
Step 13 – Get Backups Running Using VaultPress
Backups are such an important part of launching a new website.
You need to be able to restore a site quickly if there are any problems.
Issues can result from updating badly developed plugins, PHP version incompatibilities, hacking and a myriad of other stuff.
Having backups are hand is uber critical.
I have used a lot of backup plugins in the past, some free, some paid.
VaultPress is the one I use with my client sites today and it is currently being migrated into the Jetpack plugin but it’s still the same great service.
For USD $5 per month, you’ll get daily backups with 30-day data retention or pay USD $15 per month for real-time backups and unlimited data retention (my favourite choice).
Other backup plugins that I have used in the past are:
- XCloner – free and backup to Amazon S3 or anywhere using sFTP. This was my go-to plugin for many years as it has a script allowing it to be called by the Unix Cron system. Remember how unreliable wp-cron is?
- Backup Buddy – was never 100% reliable for me and left unfixed for months. iThemes have since taken it over but for me reliability is key.
- BackWPUp – Similar to XCloner but solely focusing on backups – no site cloning. Backup to Amazon S3, Dropbox, FTP and more.
Step 14 – Run Some Tests
We’re almost at the finish line now!
Last but not least on my pre-launch website checklist is testing.
I can’t tell you how many site owners have come to me to fix some basic things like form submissions, button links and email addresses.
Please please do some testing before launching a website.
Areas of your website to test are:
- Form submissions – did you get the email notification? Was the confirmation message/redirection OK?
- Button links – do they go to the correct place?
- Email addresses – are the obfuscated and do they link to the correct mailto: address?
- Navigation links – do they work OK? Are all your navigation menus responsive?
- Sign-ups – do your sign-up add the correct details to the correct mailing list?
- Payments – is your checkout working? Is the money arriving in the bank? Are they the correct prices?
- Registrations – are they working? Does the user get a notification? Can the login?
- Dashboards – what can the logged in user see? Is it correct?
- Permissions/User Roles – can the correct level of user see the correct stuff?
- Comments – are they working? Catching spam? Moderation working?
- Console errors – are there any errors in Chrome console? 404 can’t load resource? JavaScript errors?
Put it Into Practice Today
There you go. These are what I consider to be the 14 most essential things to do before launching your website.
Download the PDF Checklist or the MS Word Checklist and customise it for your own website launch checks.
If you think I’ve missed something out, drop it in the comments below.
Presentation Slides
Here are the complementary slides from the February 2019 WordPress Sydney meetup on the topic.

5 Responses
Great list Will.
– One thing to add is to disable WP_DEBUG in your site config, also check that the logging options are right for you, probably disabled.
– A second thing is to set your webserver logging options to archive so that you can follow up on hack attempts and visitor problem reports.
Another issue (though non technical) is to have the site proof read for spelling and grammatical errors, difficult on occasions I know, even getting the client to crawl all their pages can be hard enough.
Thanks Ross,
I’ll add those to the next update!