Here’s a simple bash script that will recursively set WordPress file permissions to their CHMOD recommended values. If you are running WordPress under Windows IIS then forget this post – it’s not for you!
WordPress File Permissions
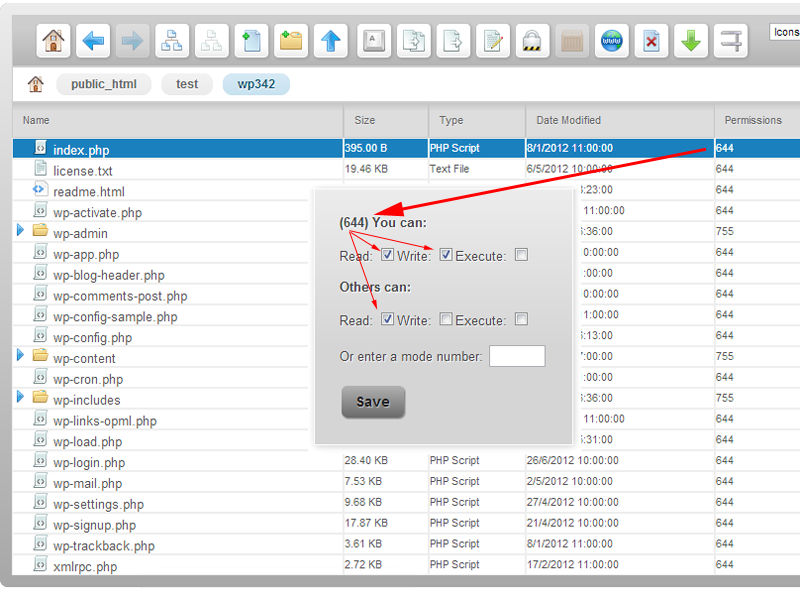
Most of you will be running WordPress on a Linux hosting platform. The file system is different to Windows and permissions on those files is also handled in a different way. If you look on cPanel File Manager, you’re likely to see a some three numbers in the permissions column e.g. 644 or 755.
Some system will use four digits, pre-pending a zero. The numbers can be confusing for noobs and those coming from a Windows background but they do the same thing by controlling the read, write and execute access of the file or folder.
- Read = 4 – Allowed to read files
- Write = 2 – Allowed to write/modify files
- eXecute = 1 – Read/write/delete/modify/directory
To make things more complex Linux identifies three different typed of users who may try to access a file or folder; users, group and world. It is the combination of access and user that makes up the numbering system.
  7       4      4
 user   group  world
 r+w+x    r      r
 4+2+1  4+0+0  4+0+0  = 744
The Linux command for changing file permissions is CHMOD (similar to Windows ATTRIB). WordPress recommends that file permission be set at 644 and folders at 755.
Changing WordPress File Permissions
You can change these a number of ways.
- Using your FTP client – assuming it has CHMOD support
- Using the cPanel File Manager – although only one file at a time
- Using PHP – although directory recursion in PHP is very resource intensive
- Using a shell script – like perl or bash – these use operating system (OS) commands which are super fast compared to the previous options
The problem is that sometimes if you upload and unpack the WordPress zip file to cPanel it will assign the wrong permissions to all files and we’re talking hundreds of files in a heap of folders. Using a recursive shell script is the best way to change WordPress file permissions throughout the folder and sub-folder structure. Here’s my bash script:
[gist id=8142897 file=code-snippet-1.bash]
Line 1 is a comment but also contains the path to your server’s bash shell – on our server it’s !/bin/sh.
You’ll have to find the full path to your bash shell from your ISP and include it here.
It’s not strictly necessary unless you are running the script on its own from an SSH console rather than feeding it through the bash shell. More on running the script later.
Lines 2-10 are comments.
Line 11 defines the full path to your root folder where your web files are stored with no trailing slash /
Sometimes called public_html or www.
Lines 13, 14, 28 and 30 are an if then else statement.
The script accepts 1 argument – the path to your WordPress folder from the root.
It checks to see if 1 argument exists. If it does then it will run lines 15-27 else it will run line 29.
Line 15 combines your site’s root folder defined in line 11 with the supplied folder argument which should be your WordPress root folder, to give a full path to your WordPress files.
Line 18 recursively finds all folders from the root WordPress folder and sets them to CHMOD 755
Line 19 recursively finds all files from the root WordPress folder and sets them to CHMOD 644
At this point all files are CHMOD 644 and all folders are CHMOD 755. We need to secure some special files though.
Line 22 clamps down on permissions for your WordPress configuration file wp-config.php to CHMOD 440.
Only the Apache server can use and change this file now.
Line 25 clamps down on permissions for your .htaccess file to CHMOD 444.
Unlike the wp-config.php file from line 22, the “world” user needs access to the .htaccess file, so we need to give this an extra 4 value.
Note that if you are updating your permalinks or you have plugins that alter the .htaccess file you will have to change its permission to allow for this then change back if you can.
You could change it to CHMOD 644 and then back to CHMOD 444 once changes were updated.
Line 27 just prints out a message when the script has completed.
Line 29 prints out an error message if no parameters were used with the script
I suggest that you put this code in the root folder of your hosting package, i.e. one folder up from your WordPress files.
You do not want people being able to access and run bash shell scripts through your website. Noooooooo.
I’ve renamed our file reset-wp-permissions.sh but you can give it any name.
Try to keep the .sh extension though. It’s not required to run but it will help others recognise the script type.
Running the Bash Script
You will need four things to run the script correctly:
- the server’s full path to bash e.g. /bin/sh You can get this from your ISP
- the server’s full path to your root folder where your web files are stored e.g. /home/sites/mydomain.com/public_html ( <– no trailing slash ) change line 11 in the script to this
- the path to your WordPress installation from the folder defined in step 3 If your WordPress installation is in the root folder, i.e. public_html or www then we’ll use / as the parameter to the script
- somewhere to run the script Either a SSH terminal window or a crontab/scheduled task option from cPanel
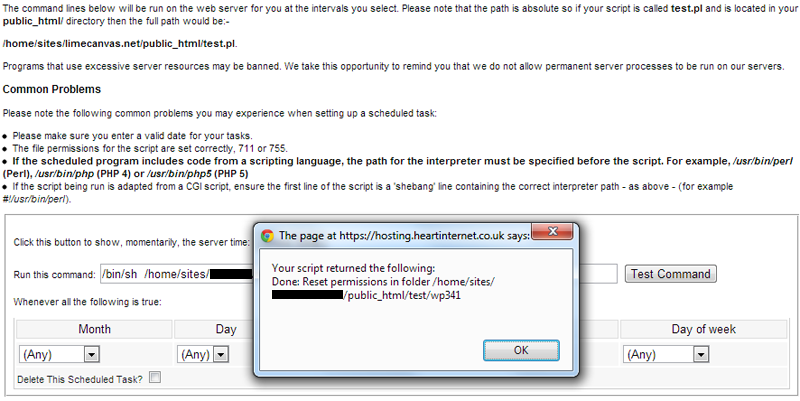
I run the script from the contab/scheduled task cPanel option.

You can see the command is entered in three parts. All parts are required:
Part 1: /bin/sh
This is the server path to the bash shell
Part 2: /home/sites/mydomain.com/reset-wp-permissions.sh
This is this is the server path to your bash shell script
Part 3: /test/wp341
This is the path to your WordPress installation from your public_html or www folder.
I could just have entered / if I was targeting the WordPress install in the public_html or www folder.
Our cPanel implementation has a Test Command button which is handy and manually runs the script.
If you one doesn’t then just schedule the command to run within the next 5 minutes. Just remember to disable the schedule after it has run.
Hopefully this will save you a lot of time resetting WordPress file permissions.

